Showing posts with label Condiments & Spices. Show all posts

Tuesday, December 12, 2017

Roasted Cauliflower and Garlic Aioli

Lauren Wheeler


Pictured above is also a breakfast egg sandwich!

Yet another great idea from Lauren Wheeler!

Roasted Cauliflower
First, pan fry the cauliflower until brown on both sides.

Then bake in the oven until tender @ 425 for about 20 minutes.

Garlic Aioli
3/4 cup homemade mayonnaise
3 cloves fresh garlic, minced
2 1/2 Tbsp lemon juice
3/4 tsp salt
1/2 tsp freshly ground pepper

Stir and serve!  Lauren and her family like it best after 10-15 minutes in the refrigerator (it lasts about 1 week).

This is great for just about everything -- meat, veggies, you name it!


Pecan Caper Salsa

Lauren Wheeler


Wow, does this look fantastic or what? And to top it off, it also serves as a plated fat!

Huge thanks to Lauren Wheeler for this idea!!!!

3 Tbsp rough chopped parsley, packed
2 Tbsp capers
1/3 cup pecans
1/4 cup olive oil
1 Tbsp red wine vinegar
1 tsp lemon zest
1 tsp currants
Pinch of salt

Just toss, and  you've got your plated fat as well as something really yummy.  Good idea for those who are getting tired of the hum-drum of their plated fats!

Friday, October 20, 2017

Herbed Mayo

Simmie Sinow

This is THE BEST mayo ever!

It also can be very thick -- which may be a blessing for those of you that have issues with runny homemade mayonnaise.

The key to not having to worry about runny mayonnaise is adding some powdered type of spices to it as the extra powder will thicken the mayonnaise up really nice.

These will become your new best friend in seasonings for your  mayonnaise:

1 whole egg, cold right out of the refrigerator
1 egg yolks, cold right out of the refrigerator
1 Tbsp apple cider vinegar
2 Tbsp dill pickle juice OR 1 tsp lime juice
1 heaping tsp mustard powder
1 Tbsp Trader Joe's "Everything But the Bagel" sesame seasoning **
1 Tbsp Trader Joe's Onion Salt blend **
2 1/3 to 2 1/2 cups oil (I use avocado oil or olive oil)

Note: This mayonnaise WILL be thick! No more fretting about runny mayonnaise.

What I do is "slam" the eggs into the bottom of the jar I'm making this in,  so as to break the yolk.  A fork or knife works just as well, but just isn't as much fun!

Add all the ingredients into your jar, in the order they are listed above. Be sure the oil is the last thing you pour in.

Before beginning to blend with your immersion blender, be 100% sure that the blender head is at the very bottom of your container.   This is critical.

Blend on low until you think your blender head is ready to pull up and LEAVE IT THERE longer.  Trust me on this.

When you think you've blended it a little too much.....give it another 20 seconds.

When it is done, it may not be super smooth, so take a spoon and just mix it up a bit and it will be fine.

You can use this as mayo or as a base for a dip to add some chipotle powder or other seasonings to as a veggie dip that also serves as your fat portion as part of your meal.

** Important Note: If you are using a different recipe that calls for less than 2c of oil, make sure to downsize the amount of the Trader Joe's spices.  Otherwise, you will wind up with mayo that sticks like glue!

Sunday, July 2, 2017

Chipotle Mayonnaise

Simmie Sinow


This is so ahhhmaaazing!!! Since I enjoy things really spicy -- if you don't -- scale back the chipotle powder to 1-2 tsp instead of the 1 Tbsp called for below.

1 whole egg + 1 egg yolk
2 tsp mustard powder
1 Tbsp vinegar (ACV)
1/2 Tbsp lime juice
2 +cups oil (I prefer avocado) **
1 Tbsp chipotle powder (try 1-2 tsp for less spicy)
1/2 Tbsp TJ Onion Salt blend

1/2 Tbsp chives

** With the addition of powders and spices, the 2 cups of avocado oil very often is not enough and the mayonnaise comes out really thick. What I recommend doing is adding more oil at the end and continuing to blend and then when you're done, take a spoon and just mix it.

Place head of immersion blender in bottom of measuring cup (2 cup measuring cup works just right).

Blend.

Move head around the *bottom* of the measuring cup, but don't lift up. Keep blending bottom ingredients until thoroughly emulsified.

ONLY move the head of the immersion blender up when it has emulsified up to the very top except for a very thin layer of oil on the very top. Do not do this too soon. Do not tilt sideways!


Sunday, November 29, 2015

Absolute BEST Mayo Recipe Ever

Modified from recipe on Healthy Indulgences Blog


I've got a recipe on my blog, but have started using this one, which works PERFECT every time. You just CANNOT GO WRONG with this recipe. The key to success is in the process, so pay close attention!!!

1 whole egg + 1 egg yolk
1/2 Tbsp mustard powder
1 tsp sea salt (start with less, as this is too much for me)
1 Tbsp vinegar (ACV)
2 Tbsp pickle juice OR 1/2 Tbsp lime juice
Scant 2 cups oil: do NOT use EVOO or Olive oil...use Extra Light Tasting Olive Oil or Avocado Oil

Combine all ingredients in a 2 cup measuring cup, adding the oil LAST! Place head of immersion blender in bottom of the measuring cup and Blend.

Move head around the bottom of the measuring cup, but don't lift up. Keep blending bottom ingredients until thoroughly emulsified, then do that some more. You want to go beyond what you think you need, time-wise, for blending.

THEN...Move blender up and down now, getting all the oil on the top mixed in. Do not tilt sideways!

The KEY to success with this is blend the bottom ingredients BEYOND what your mind tells you is enough -- at least 1-2 minutes, before lifting.

This is a video that shows the process perfectly -- do not use it for ingredients, as some of their measurements are off and at least one ingredient is not compliant.

Be sure and watch the FOLLOWING VIDEO (click on that link!) to see the process, but don't follow the list of ingredients!


Tuesday, September 1, 2015

All Purpose Spice Mix

Simmie Sinow

This is my all-purpose spice mix that I use for just about anything and everything!  It goes on eggs, rubbed on chicken before baking, a little sprinkled on salmon before broiling, dumped in an oil+other spices mixture for spicy casseroles -- basically, you name the dish, it gets some of this put on it.

I got tired of having to keep making it in the smaller bottles I have, so I am using an old large Costco Granulated Garlic 18 oz jar for it and made 6x the recipe (the recipe I use is 1 Tbsp each, more or less).  I'm hoping this will last me a while!

EQUAL PARTS of:
Smoked Spanish Paprika (this is sweeter than the usual paprika)
Garlic Powder
Onion Powder
Ancho chile powder or Chipotle powder
Salt

Sometimes I modify it and use a BBQ spice in this as well.

Saturday, December 6, 2014

Hoisin Sauce

Modified from MyPurplePaleo


I love my hoisin sauce!  I found a recipe online and modified it a bit to my liking!

This will give you about 1/4 cup

¼ cup coconut aminos
1 Tbsp almond butter
1 - 2 Medjool dates, pitted and chopped
2 tsp white vinegar
1/8 tsp garlic powder
1/8 tsp onion powder
2 tsp sesame oil
1 tsp hot sauce (try Frank's Hot Sauce which is Whole30 friendly)
1/8 tsp black pepper


Combine all the ingredients together in your blender or food processor and blend it until it is well combined.  With the almond butter, it will be a bit thicker than just a liquid sauce, which is how it should be.

Note:
Normally I would say if you don't want to spend the money on the coconut aminos ($7/bottle), to just use heavily salted water.  In this recipe I'm not sure the heavily salted water would work; I've not tried that yet, but down the road I probably will.

The coconut aminos are a replacement for soy sauce, but not that close as they are definitely on the sweet side and very little (if any) salt to them.

Tuesday, November 25, 2014

Make-Ahead Bulletproof Coffee Fixins

Shi Breedlove

1 cup homemade nut milk
3/4 cup coconut cream
3 Tbsp ghee
Spices of choice (cinnamon, pumpkin pie spice, nutmeg, unsweetened carob)

Melt first 3 ingredients together in microwave

Add spices & blend in blender on high for 30 seconds. 

Store in refrigerator. I use mine up before I have to worry about it going bad. I'm sure it will keep for a couple of weeks. Enjoy!!

Notes from Simmie: 
  • The nut milk can also be store bought, for those who don't want to make their own!
  • The good-by date for this would be that of the nut milk or coconut cream; homemade nut milk generally lasts about 5 days or so, whereas store bought will last a bit longer.


Saturday, November 15, 2014

Crockpot Ketchup

Modified from a recipe on BalancedBites website


This was taken in part from a recipe on Diane Sanfilippo's website, and modified a bit in both ingredients and the process.  It's still a bit of an in-the-works project, as it is a bit thicker than I like my ketchup -- but the flavor is to die for!

1 small onion, diced
2 apples, peeled and diced
2 cloves garlic, minced
1/2 teaspoon sea salt
1/4 teaspoon allspice
1/4 teaspoon cinnamon
2 pinches of cloves
1/4 teaspoon ginger
1 pitted Medjool date
2 Tbsp apple cider vinegar (next time: 2.5 Tbsp, see note below)
1/4 cup water (next time: 2/3 cup, see note below)
6 oz tomato sauce

Place all ingredients into a slow cooker and stir to combine. Set the slow cooker to low and cook for 4 hours.  I have a small crockpot (2 quart) that I use for making my own Ghee and for individual portions of food items, so I used my small crockpot.

After 4 hours, remove the crockpot from the heating element and let it cool just a bit and then put in your food processor or blender.  Be sure not to fill your blender too full, as warm items tend to expand. Blend until smooth.

Since this is fairly chunky to begin with, what I did was I put it in my larger Ninja and blended the heck out of it, then transferred to my smaller one and blended until I thought it was ready, and then kept blending.

NOTE:
This was still fairly thick, and I'm thinking that it was because my small crockpot runs a bit on the warm side, so next time I will increase the water from the original 1/4 cup the recipe calls for, to 2/3 cup, and also add 1/2 Tbsp extra apple cider vinegar, possibly at the very end of the cooking process for the extra being added.  Another option is to cook less time, thereby keeping more of the water in the crockpot and not evaporating as much.

Once blended, place the ketchup into glass containers and allow it to come to room temperature before refrigerating.


Thursday, November 6, 2014

Butter Alternative, Paleo and Whole30 style

Adapted from Predominantly Paleo's recipe

Someone posted a recipe for Paleo Butter recently, and it sounded so easy I thought I'd give it a go.

It was wonderful in liquid form!!!! However, once it firmed up, the salt seemed to rise to the top and it was like dipping my spoon in a shaker of salt.

NOT good!

Since I plan to use my Butter that I made in liquid form -- over veggies or maybe even in my frying pan (I haven't figured out if I want to try that or not), it's no big deal as I can just stir it up and it'll be fine.

What I wound up doing is making a double batch and using just a PINCH of salt.  Pinch as in grabbing a small amount of salt between your thumb and forefinger and putting a little in the container you're making it in.

OR....what I just did was I made a double batch and used 1/4 tsp of salt and that seems to be just about right.

So here is my final modification for the recipe:

4 Tbsp full fat coconut milk
6 Tbsp olive oil -- this can be light olive oil as well
4 tablespoons melted coconut oil
6 tablespoons avocado oil
1/4 teaspoon salt

Blend it well, until it is completely blended.  Then place in the refrigerator to firm up, or in the freezer for 30-60 minutes.


Friday, September 26, 2014

Sweet Cherry BBQ Sauce & Ketchup

Simmie Sinow

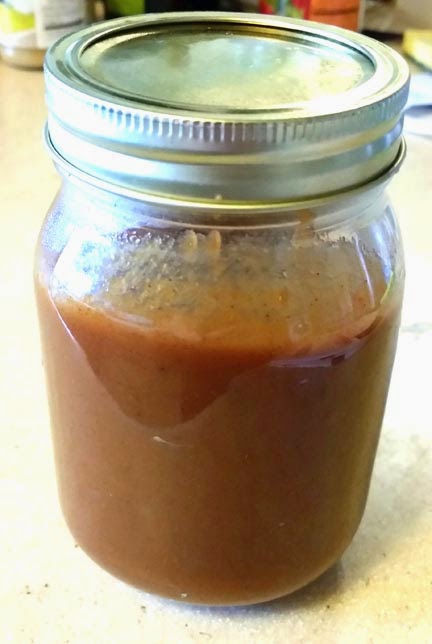
The photo below appears very brown, but really is not! It was made with dark cherries which for some reason made the photo look almost brown (that and lousy lighting in my kitchen!)

This recipe makes about 1 1/4 quarts of BBQ sauce or Ketchup.

This recipe can double as a recipe for ketchup as well as BBQ sauce. When making it into Ketchup, I simply add a little bit of water and blend it with my Immersion Blender (really, any blender will do) until it is very smooth and has a ketchup consistency.

Easy Peasy, eh?

1 lb cherries, pitted (or a bag of frozen that's been defrosted)
3/4 cup water
2 Tbsp balsamic vinegar
2 Tbsp yellow mustard (I use dry, but any type will do)
2 tsp onion powder
1 tsp garlic powder
6 Medjool dates, pitted (do not use regular dates, they need to be Medjool)
24 oz can crushed tomatoes, strained
5 Tbsp coconut aminos OR 5 Tbsp heavily salted water (1/2 cup water + 3/5 Tbsp salt)
2 tsp paprika (I use smoked)
1 tsp black pepper

In a large saucepan, heat the cherries, dates, and water over medium-high heat for about 10 minutes, until softened.

Add the rest of the ingredients, stir well to combine, and heat until bubbling. Reduce heat to low, and let it cook for 30-45 minutes until it thickens.  I cook this until the cherries break up easily when mashed a little bit with a potato masher.

Mash with a potato masher if you want it to remain thick, then put into a storage container and store in your refrigerator.

For a Smoother, More Liquid Sauce (Ketchup-y, even):

Put the mixture, along with some extra water (start with 1/4 cup) in your regular blender or use an Immersion Blender to puree the mixture well.

This serves a dual purpose as BBQ sauce and ketchup, depending on the consistency you choose!

This stays fresh and tasty for two months in your refrigerator -- if you don't consume it before then!


One of these days, I will remember to take a picture of the final product for this post!

A Note On The Coconut Aminos

Coconut aminos are a replacement for soy sauce, but in no way do they taste like soy sauce.  They are sweeter, and not very salty.

Instead of paying the high price for Coconut Aminos, I just use heavily salted water in my recipes instead of the coconut aminos -- it is actually a closer taste to soy sauce than the aminos are.  Plus you're saving your checkbook!


Thursday, September 25, 2014

Crockpot Ghee

Simmie Sinow


What you will need:


Butter from grass-fed cows, salted or unsalted (2-8 bricks, depending on how much you want to make)

Crockpot

Nut Milk Bag or Doubled-Over Cheesecloth

Strainer (optional: mostly just to make things easier than wrangling the nut bag or cheesecloth)


Please! Do not scrimp on the butter being from grass-fed cows--I've tried this with butter that was not from grass-fed cows and trust me, you do not want to do this.  With the salted butter, a lot (but not all) of the salt mixes in with the milk solids and gets strained out.


Let's Get Started


Place at least two "bricks" (totaling 1 lb or more) butter from grass-fed cows that is unsalted into your crock pot and set to Low.  I use 2 bricks, as the crockpot I use is a small one that is 2 quarts. I've made it with 3-4 bricks in my small crockpot. If you have a larger crockpot, you can use anywhere from 4-8 bricks. Just make sure you have a container large enough to store it in once you're done!

Set it on high for about 45 minutes, then low for 8-12 hours.  Lid ON.

How Do I Know When It's Done?

After a number of hours, the mixture will start bubbling a bit. Let it keep bubbling, just make sure it doesn't burn -- it is still usable if it turns brown, but tastes much better if it doesn't.

You will notice the clear butter (or ghee) is sitting on top of the milk solids (the milk solids sink to the bottom of your crockpot).  That's the way it should be -- it's just the opposite of how it works on the stovetop.


Straining the Butter To Get The Milk Solids Out

Put a Nut Milk Bag or doubled over Cheesecloth over the container you'll store it in and pour your entire mixture through it to strain out the milk solids. You should end up with almost as much product as you started out with. There should only be a small amount of milk solids left that can be trashed.


This photo shows a small amount of the milk solids in the Nut Milk Bag that I used -- 
you can just toss these out once you're done.

Voila! Homemade Ghee!

The product in your storage container will be completely liquid -- that's the way it should be. If you want to firm it up a bit, put it in your refrigerator for a few hours -- but long term, there is no need to refrigerate it.

The photo below is actually more translucent/see-through than it appears to be.


Sunday, August 10, 2014

Simmie's Foolproof Mayonnaise

Simmie Sinow

This recipe is the result of trial and error with several different recipes online (NomNom Paleo and SeriousEats) that didn't quite "cut it" for me.  This is now my 100% foolproof recipe using a stick/immersion blender.

The foolproof part of it, I believe, is in:
  • the size of the egg yolk
  • using egg yolk only and not a whole egg
  • the temperature of the egg yolk and water
  • Using a blender cup or the cup that comes with your blender and not your mason jar!
This recipe requires a stick blender. This method WILL NOT WORK in a regular blender.

Are you tired of struggling with making mayonnaise in a regular blender? How about the oil dribbling that has to be done so slow that it almost feels like you're not adding any oil to it at all? For about 3 minutes, no less!

Well fear not, this is a recipe that will take about 30 seconds start to finish, if that; probably closer to 10 seconds.


THE RECIPE!
Here we go.  First the ingredients:

Put the following in a blender cup or a 2 cup mixing bowl. Do not use your mason jar for this unless you want failure!!

1 Jumbo egg yolk, cold
1 Tbsp water, cold (as in from the refrigerator door or ice cold)
1/2 Tbsp lemon juice (this is too much for me; I use lime juice or ACV instead)
1 heaping tsp dry mustard (I sometimes double this, you don't taste the mustard)

Swish it around a bit until you can see that it's well blended....no little bits of the mustard powder floating anywhere. Do not use your blender for this part!

Then add, all at once:
1 cup olive, walnut, or avocado oil (you can also use light tasting olive oil)

Place the head of immersion blender at bottom of the cup and switch it on (set it to low, not high). As mayonnaise begins to form, continue to let it emulsify thoroughly -- the oil will be sitting on top at the this point and that's ok. Move the blender head around and then slowly lift it up (do NOT tilt the container)  until all the oil is emulsified. Make sure you don't see any sneaky remnants hanging onto the side of your blender cup!

Hint: If you blend the oil in for too long, you may wind up with runny mayo; don't throw it out! You can make Dump Ranch dressing from that.

Season to taste with salt.  Personally I think this tastes great without salt, but everyone's salt level is different.

Store in a sealed container in the refrigerator.

How long will this be good?
It should last at least five days beyond the expiration on your egg carton. Mine is usually good for about 3 weeks.  But then again, mine doesn't usually last long enough to find that out!

How do I know when it has gone bad?
Two ways!
(1) Smell test -- smell it and if it's gone bad, it MAY have a slight overly sweet or (I hate to say this....but...) rancid smell, but NOT always.
(2) My sure fire way to test it is to dip the prongs of a fork in the mayo, and just "dot" it on your tongue -- if it's gone bad, you'll know that way, before you use it in a recipe.

Thursday, June 26, 2014

Taco Seasoning

Recipe Author: Becky Yokeley

While this is intended as taco seasoning, make up a triple batch and use it on a lot of different things: ground turkey/beef/pork, a small amount on salmon, eggs, etc.  Your creativity is the limit on this!

1 tbs chili powder
1/4 tsp garlic powder
1/4 tsp onion powder
1/4 tsp cayenne
1/4 tsp dried oregano
1/2 tsp paprika
2 tsp ground cumin
1 tsp coarse salt


Wednesday, June 4, 2014

Tartar Sauce, Paleo Style


Picture


Really easy recipe, from Paleo Cupboard, for tartar sauce!  

All you need is some homemade mayonnaise, lemon juice, minced onion, sea salt, garlic powder, dill, and parsley.

Paleo Cupboard's recipe can be found HERE.